PacGenesis Blog: How to Start a Transfer with Aspera Connect
PacGenesis Blog: How to Start a Transfer with Aspera Connect
Introduction
IBM Aspera Connect is a web application-based offering built on the Aspera transfer server that allows users to upload and download files at unparalleled speeds. This easy-to-download transfer client allows users to move files and folders of any size seamlessly through a simple download and installation process.
Features of Aspera Connect:
- FASP file transfer protocol
FASP is an IBM proprietary network-optimized data transfer protocol designed to send large files across the web with unprecedented speed and security. This is the supported protocol for IBM Aspera Connect.
- Web-browser support
IBM Aspera Connect is browser agnostic supporting Firefox, Google Chrome, Safari, Internet Explorer, and Edge Chromium.
- Flexible transfer type support
IBM Aspera Connect supports files of any size and type. Whether it’s single files, multiple files, or entire directories, Aspera Connect provides support for user’s data transfer needs.
- Monitoring
Aspera Connect comes equipped with a built-in transfer monitor for visual rate control and monitoring.
How To Set Up Aspera Connect
Installation
To set up Aspera Connect, start by downloading the client. Once downloaded you can follow a guided installation process or manual installation process found through the IBM Aspera Connect installation guide. The application itself acts as a web browser add-on just like any other web browser add-on you’ve installed previously.
Network Environment
This installation process will require some network configuration typically to allow outbound and inbound traffic when transferring data to the Aspera transfer server. There are some network requirements stated via the IBM Aspera Connect installation guide as follows:
- Outbound connections for SSH, which is TCP/33001 by default, although the server-side may run SSH on another port. Check with your IT department for which SSH ports are open for file transfers.
- Outbound connections for FASP transfers, which is UDP/33001 by default, although the server-side may run FASP transfers on one or more other ports. Check with your IT department for which SSH ports are open for FASP transfers.
Reference the Aspera Connect installation guide for all other installation considerations.
How To Transfer Files With Aspera Connect
For those who are interested in testing the Aspera Connect services before going through the installation, you can test the services through IBM Aspera Connect’s demo lab.
Initiating a transfer is easy. After installing the Aspera Connect services through your browser add-on, you can view your cloud-native Aspera transfer server. The first time you access your Aspera environment, you’ll find an empty repository. You’ll need to start off by uploading some files to your Aspera platform before storing and managing these files in your cloud-native platform.
The easiest way to get familiarized through the transfer process is through interaction with the Aspera Connect demo lab. Follow the associated steps to gain access to a demo environment to walk through the file download steps.
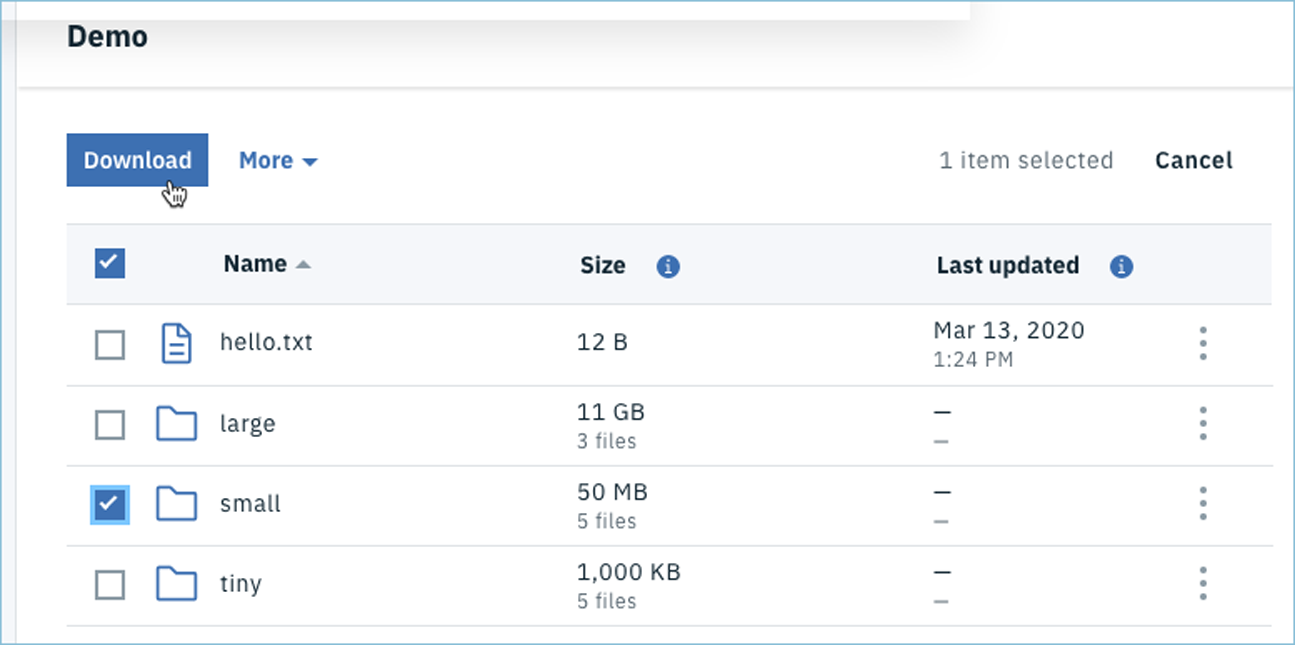
Once in the Aspera Connect demo lab, you can simply select which files you would like to download by selecting the blue box next to the file or folder and then selecting ‘Download”.

It’s really as easy as that! IBM Aspera Connect is designed for ease of use and multi-browser support to get you transferring files quickly and easily.
What is Aspera Client?
There are many different types of clients for Aspera based on their requirements and capabilities. All of these clients enable high-speed, FASP transport with real-time transfer monitoring and bandwidth control. The clients come with built-in security with user authentication, encryption in transit and at rest, and data integrity verification. Some other advanced features of the client include automation with hot folders, scripting, and custom post-processing as well as integrated scheduling, queuing, and reordering control.
The Aspera Connect Client is the most popular option to enable transfer to and from Aspera servers via a web application. It can be used with Aspera apps like AoC, Faspex, and Shares. It can also be leveraged with a custom web application that uses the HSTS for transfer. The Aspera Connect Client supports Firefox, Chrome, Safari, and Edge browsers. For operating systems, it supports Windows, MacOS, and Linux. All transfers through Connect Client are recorded and reported into Aspera Management Apps for administration and review.
Next Steps
IBM’s Aspera Connect is truly designed for fast, easy, and flexible file transfer. This web browser-based application is easy to configure, getting you online and transferring files to the Aspera transfer server in a matter of minutes! If you’d like to learn more about Aspera or other solutions that support today’s data transfer needs, consider reaching out to one of our highly capable team members here at PacGenesis.
About PacGenesis
PacGenesis is a leading IBM solutions partner enabling users as they incorporate IBM solutions. PacGenesis has supported over four hundred customers in its installation and use of leading technology-focused solutions. To learn more about PacGenesis, follow @PacGenesis on Facebook, Twitter, and LinkedIn, or go to www.pacgenesis.com.