How to Maximize User Experience with Aspera on Cloud Key Features and Applications
How to Maximize User Experience with Aspera on Cloud Key Features and Applications
Do you need a file transfer solution that provides quick and easy package sending, shared inboxes to collaborate, an option for public links for unauthenticated sharing, and offers automated activity reporting? Aspera on Cloud has all of these capabilities, and in this blog, we will give insight on how and when to use these features to optimize user experience.
Package Sending
When you want to send digital assets such as files, folders, videos, images, etc., you can do so through this feature. To access it, log in to your Aspera on Cloud account and click on the Packages application.
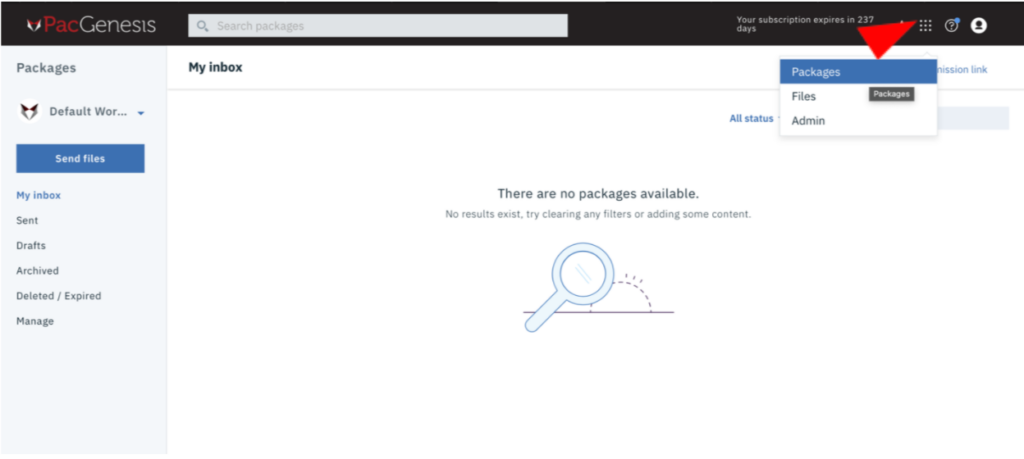
Then on the left-hand side, click on “Send Files.”
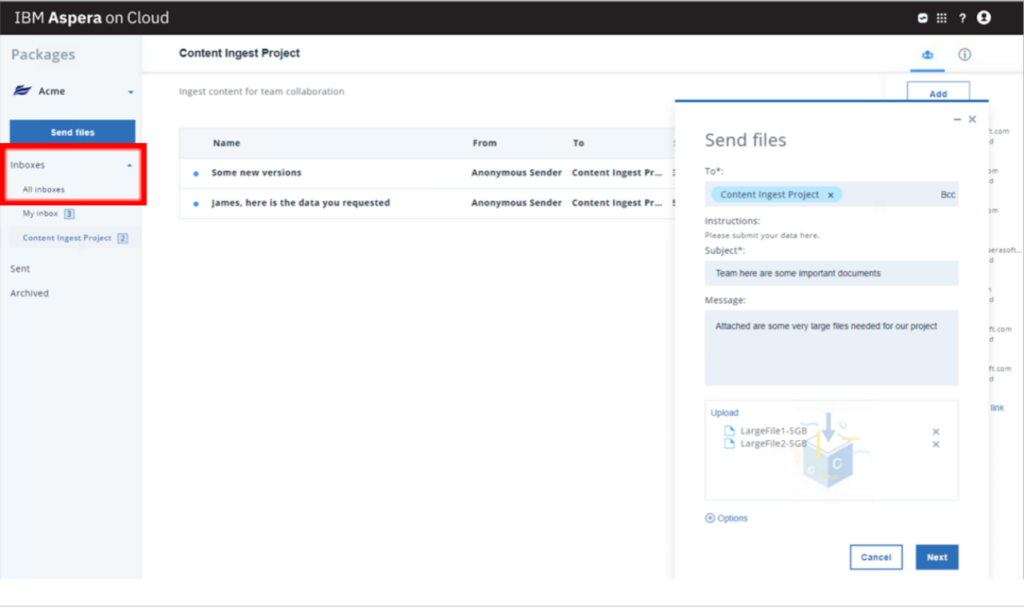
In the image above, you can see that the interface looks similar to how you send an email. When you want to send a package, enter your recipient’s email address, subject line, and your message. You can send a package to a single recipient, or add multiple recipients to collaborate with a group. When you click on upload, you can attach files from your desktop or from the Files app (for content that is already in the cloud). When sending packages through Aspera on Cloud, your assets are copied for each recipient, and the content goes unchanged. The recipient(s) will receive an email notification to their inbox letting them know they’ve received a package and to “Click here to download.” You can also go back to the dashboard to the left-hand side and click on “Sent.” There you can find detailed information about the package you sent and just like that you’ve sent your first file package.
Shared Inboxes (Feature inside of Packages)
If you regularly send and share digital assets with multiple owners or recipients, the optional Shared Inbox feature may be for you. An Aspera on Cloud Shared Inbox allows send packages to various members to access packages and collaborate. All members chosen to be a part of the shared inbox will receive their own copy of the shared content. As the administrator, you can set up different permissions for each member. Individuals can be a part of more than one shared inbox and have additional or different permissions within each.
Administrators can also configure custom metadata fields for each shared inbox. These fields can be set as optional or required, and any metadata tags created can describe the content to the recipients, so they do not have to necessarily open the content to see what it is. Adding metadata can also help members within the inbox to quickly sort out different packages.
To learn more about shared inboxes and how to set up different permissions for your users, check out the video below:
Public Links
Aspera on Cloud provides two different options to share a public link. You can either share a public link through the Files app or the Packages app.
Files App
The first option enables users to share folders with recipients who do not have access to their workspace in the Files app. As the user, you can set up different permission for recipients when accessing the content. You can set permissions to edit, preview, download, upload, or add custom permission. This feature offers a quick and easy unauthenticated sharing process for non-Files app users to access your shared content with just a click of a link. If the administrator wants the link to be even more secure, they also have the option to set a password for the recipient.
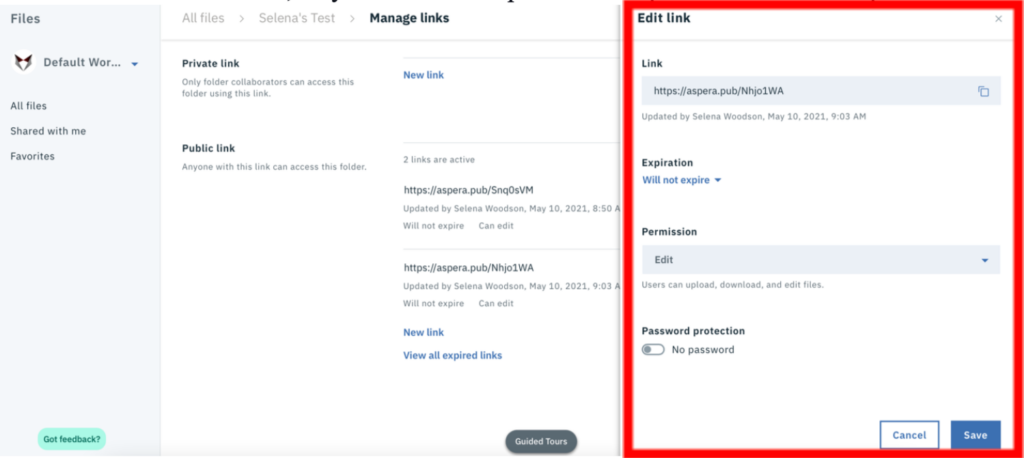
The process of using and setting up a public link to share is simple and instantaneous. Aspera on Cloud will send your recipient an email that includes the public link. When the recipient clicks on the link or puts it into a separate browser, they will be sent to the AoC portal giving your recipient access to the shared folder. As stated above, the recipient does not need to have any login information to access the folder unless the administrator/user added password protection.
Packages App (Shared Inboxes)
Through the Packages App, administrators/users can send public links that allow public submissions to be added into their user inbox even if the recipients do not have an AoC account. Like in the Files App, administrators/users can set up different permissions for their recipients when sending the link. It also includes an extra feature that allows administrators/users to set up custom metadata.
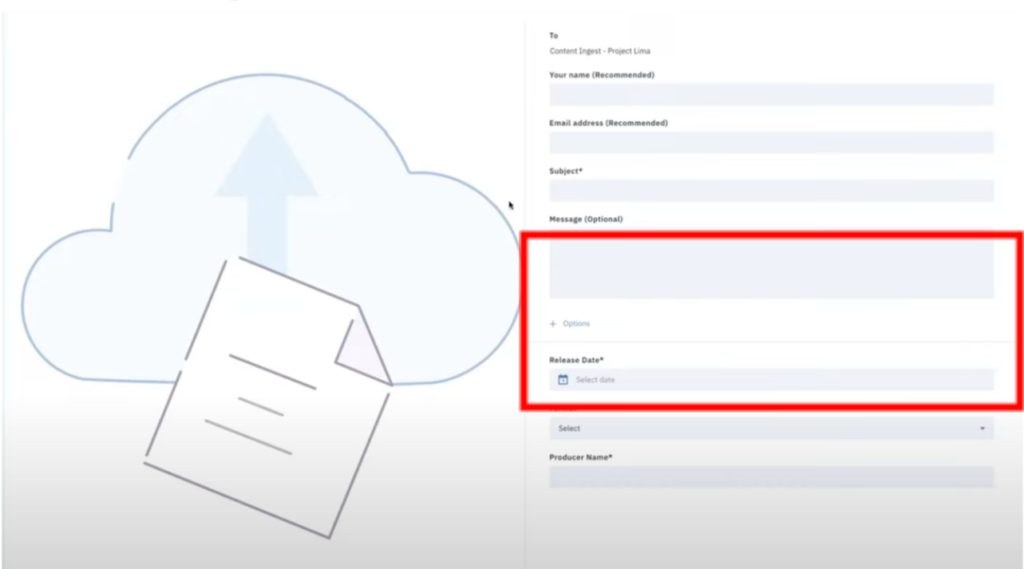
To use this public link, recipients can take the link and put it into a new browser. An ingest form will come up where the recipient can add their personal information and files or folders. The submission form only requires the recipient to input information in the subject line as well as the custom metadata. Looking at the image below, the extra fields created from the metadata are the release date, format, and producer name.
These public links are excellent for external ingest use cases where user-generated content needs to be submitted. It is also great if you only need to share a file a few times with a one-off transfer partner/user. Instead of setting up a full user account or an entire workspace for them, you can instantly send a public link.
To see how to set up public links, watch this video:
Activity Reporting
Activity reporting gives administrators and users an interactive look at what’s been happening in their Aspera on Cloud environment. Administrators must explicitly give users access to its users so they can see the content. To get to activity reporting, just go to the right-hand corner and click on , and a drop-down menu will come up where you will then click on “Activity.” From there, you will have four different reports to look into: transfer activity, volume usage, file access, and application events.
- Transfer Activity shows the download/upload rate and shows what transfers you have completed. It gives you the option to narrow down the information you want to be displayed, such as specific node names or access keys. You have the option to export all the data displayed as a CSV file, and everything is also available via API to pull on your own dashboard.
- Volume Usage shows how much workspace storage is there.
- File Access is very detailed and has audit-like capabilities. You’re able to see who has what permissions to what workspaces. You have the option to narrow down your search to users, file names, or specific workspaces. You also have the export option, if needed.
- The Application Events reporting is an even more detailed audit capability that shows everything on the system. It not only shows what’s been shared like public links but log in information when are where users are accessing folders.
As a SaaS offering, activity reporting is vital from a security perspective to ensure you have everything covered and secure.
Aspera on Cloud was designed with the user in mind. These key features will ensure that your files are safe, shared quickly and that you have all the access you need to perform tasks efficiently and without hassle. For more information on other features of Aspera on Cloud, feel free to check out our other blogs on our website at https://pacgenesis.com/blog/.
To learn more about PacGenesis, follow @PacGenesis on Facebook, Twitter, and LinkedIn, or contact us at pacgenesis.com.