Accessing your IBM Support Account
IBM has long since been known for its rock-solid customer support. But for many A spera customers, opening tickets via the Support Portal is a new and unfamiliar process. For that reason, we’ve put together this short tutorial to guide you on how to set up and enable your support account. It’s important to complete these steps when you initially purchase your Aspera software in order to avoid time-consuming setup procedures when time is most valuable.
- The support portal can be accessed via this url: https://www.ibm.com/mysupport/s/. You’re required to login with your IBM ID. If you don’t have an IBM ID, follow the prompts on the login screen to create one.
- Once you’re logged into the IBM Support Portal, click “Manage Support Account” in the top level navbar, and then “Support access”.
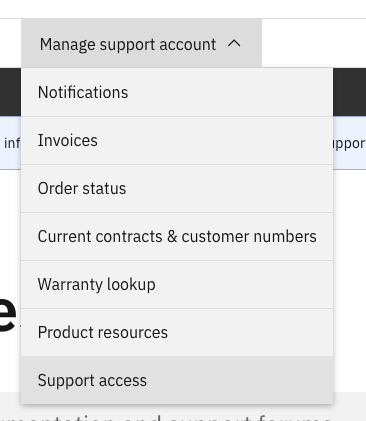
- The Support access screen will list all of the IBM accounts that you are associated with as well as your access level. If you see your company’s account listed here with a status of “Approved”, there is no need to go any further. Your account is setup properly and you are ready to open tickets if there is ever a need.
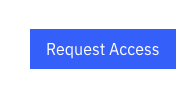
If your company’s support account is not listed, click the “Request Access” button.
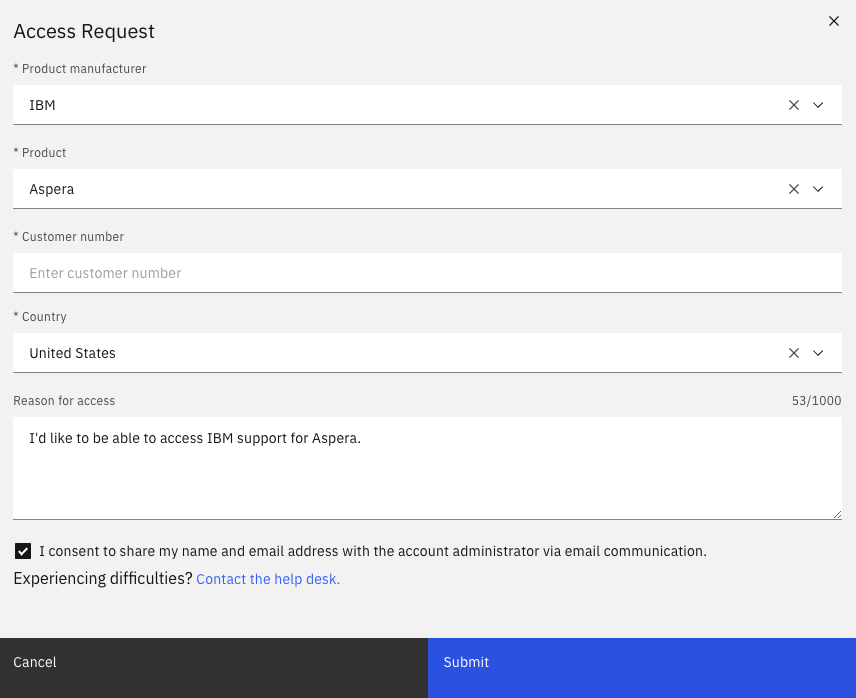
- On the request access screen, select “Aspera” as your product, and then answer the remaining questions on the form. Your IBM Customer Number can be found on your Aspera Welcome Email, on your IBM Proof of Entitlement, or by contacting your PacGenesis account manager.
Once this form is submitted, an email will be sent to the administrator within your organization for approval to be added to your company’s IBM support account.
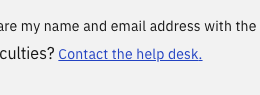
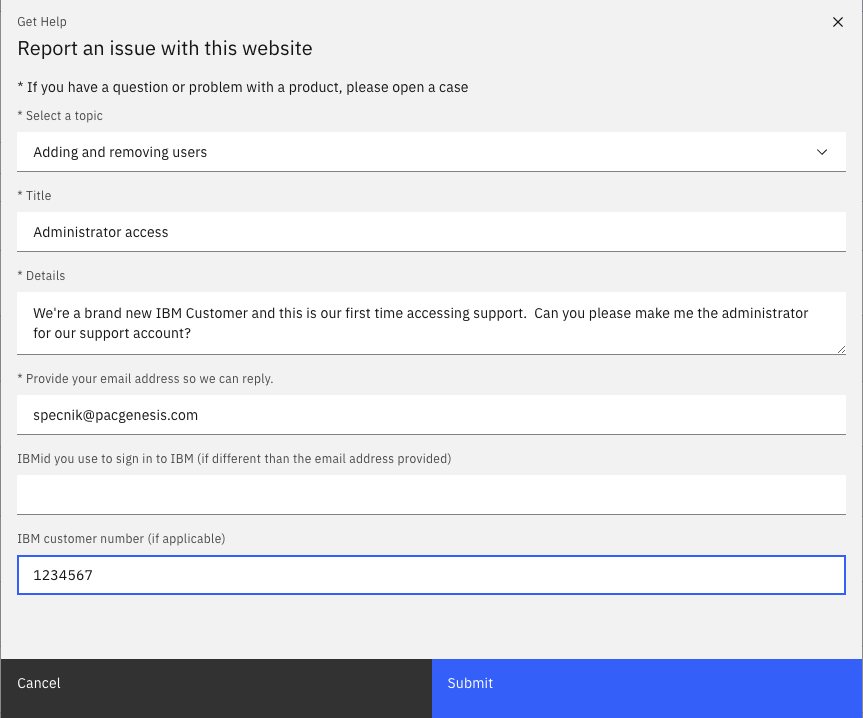
- For brand new IBM customers or situations where the administrator has left the company, simply click the “Contact the help desk” button on this same screen.
- Complete the “Contact the help desk” form with a request to add you or someone within your org (that has an IBM ID) as an administrator on the account. The typical response time for the help desk is 15 minutes.
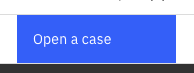
- Once your account is setup, you’re ready to open tickets by clicking “Open a case” in the top right corner of the support portal
Changing Access
To request an access level change:
- In the Actions column, select Change access.
- Select the contact information consent checkbox.
- In the Change Access window, use the toggle controls to change your desired level of access for each of your accounts. The account that was active when you clicked Change access displays first.
- Click Submit.
Note: You can also request a change to your access level or request access to another account by selecting Request access on the Access Request window.
The account status changes to Pending and displays at the top of the table. .
Note: If you have full access and request administrator access, the existing access level changes to Administrator and the status becomes Pending. Also, the Denied status does not display if your administrator denies your access request. Instead the access level returns to Full and the status to Approved.
Downgrading Your Access Level
You can only downgrade your access from Administrator if there is another administrator on the account. That administrator must approve your downgrade request. You cannot remove your own Administrator access. If you are the sole administrator for an account, you cannot request a more restrictive level of access for yourself.
Resending a Request
After you submit an access request, Resend displays in the Actions column. Select Resend to send the same request to the administrator again.
Clicking “Resend” will not cause a window to appear. Instead a message will appear in a green banner at the top of the screen confirming that your account request has been resent to the administrator.
Creating a Request After a Denied Request
If an administrator denies your request, select Create new request in the Actions column to request again. The Support Access window displays. Complete the form as described in the Requesting Access section and then click Submit.
Note: If you have already given consent for email communications, this window displays with the checkbox selected.
Additional Status Information
The status of your access requests display in the Status column. Select the help icon to view more information about the status change.
Requests with a Pending status also display the specific time and when you made the request. For example,
“Request was sent on 25 Jul 2019 at 11:43 am (7 min ago) to administrator and is currently pending approval. Requested access level: Full User.”
To learn more about PacGenesis, follow @PacGenesis on Facebook, Twitter, and LinkedIn or visit us at pacgenesis.com.